7. Nova Mass Pay
Welcome to the Nova Mass Pay section. This feature lets you send mass payments to multiple beneficiaries in one action. You can create sub-accounts and link them to groups to make it easier to manage and forecast your mass payment budgets. Follow the steps below to create a group and launch a payment.
Step 1: Create sub-account (Optional)
Before creating beneficiary groups, you can create a specific sub-account to manage and isolate the budget allocated to your mass payments.
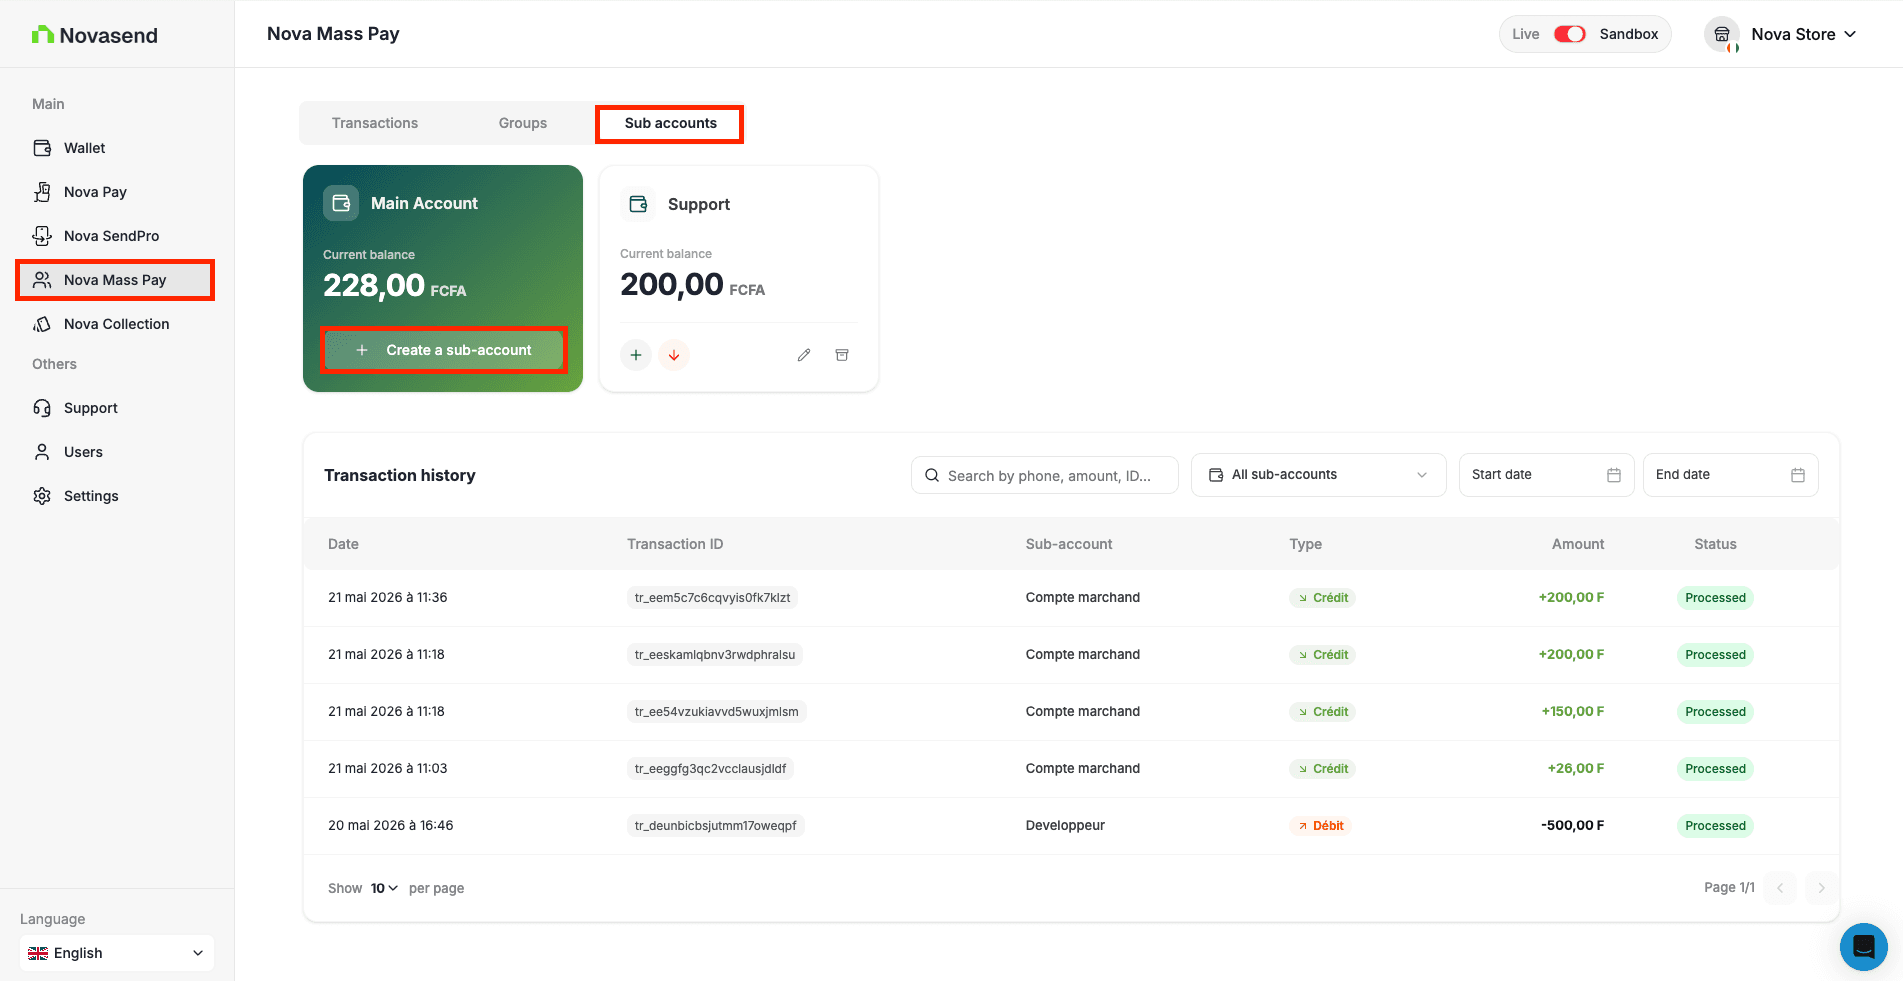
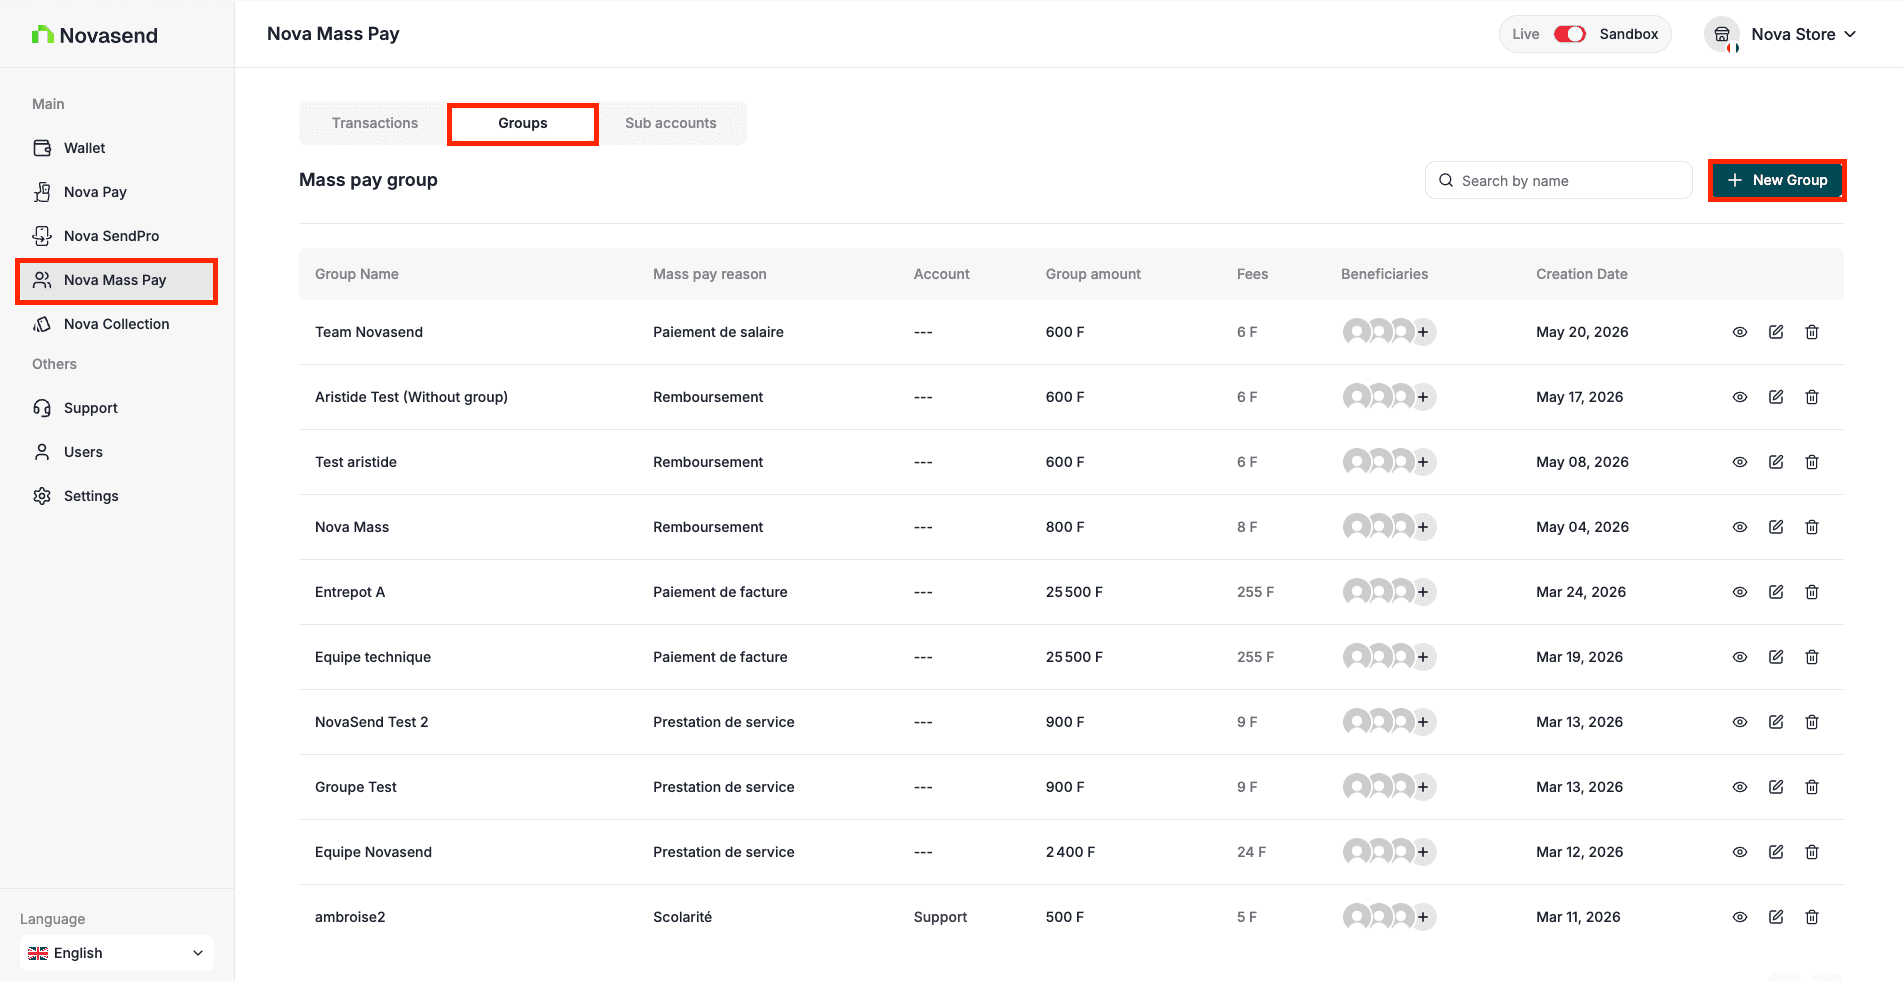
- Access the Nova Mass Pay section from the sidebar, click the Mass Pay tab, then the Sub accounts sub-tab to create a sub-account.
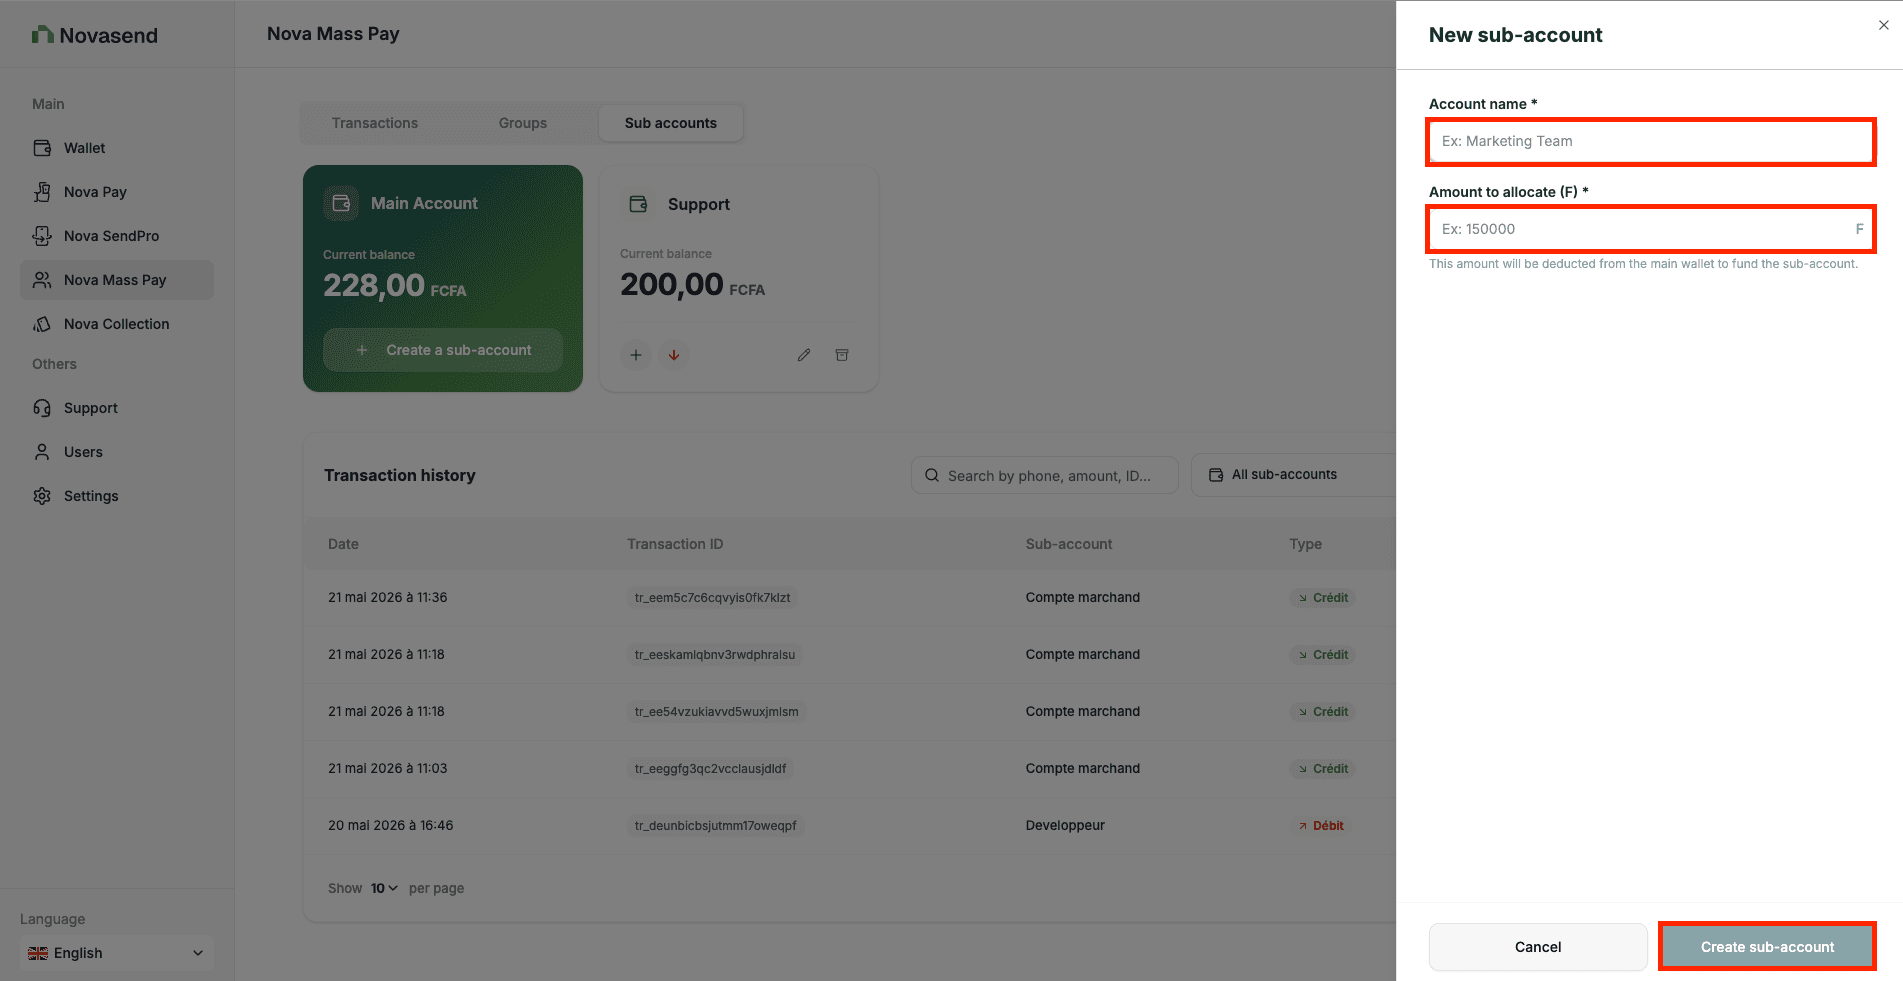
- Fill in the sub-account form with the name and allocated amount, then create the sub-account.
Step 2: Access Nova Mass Pay and create a group
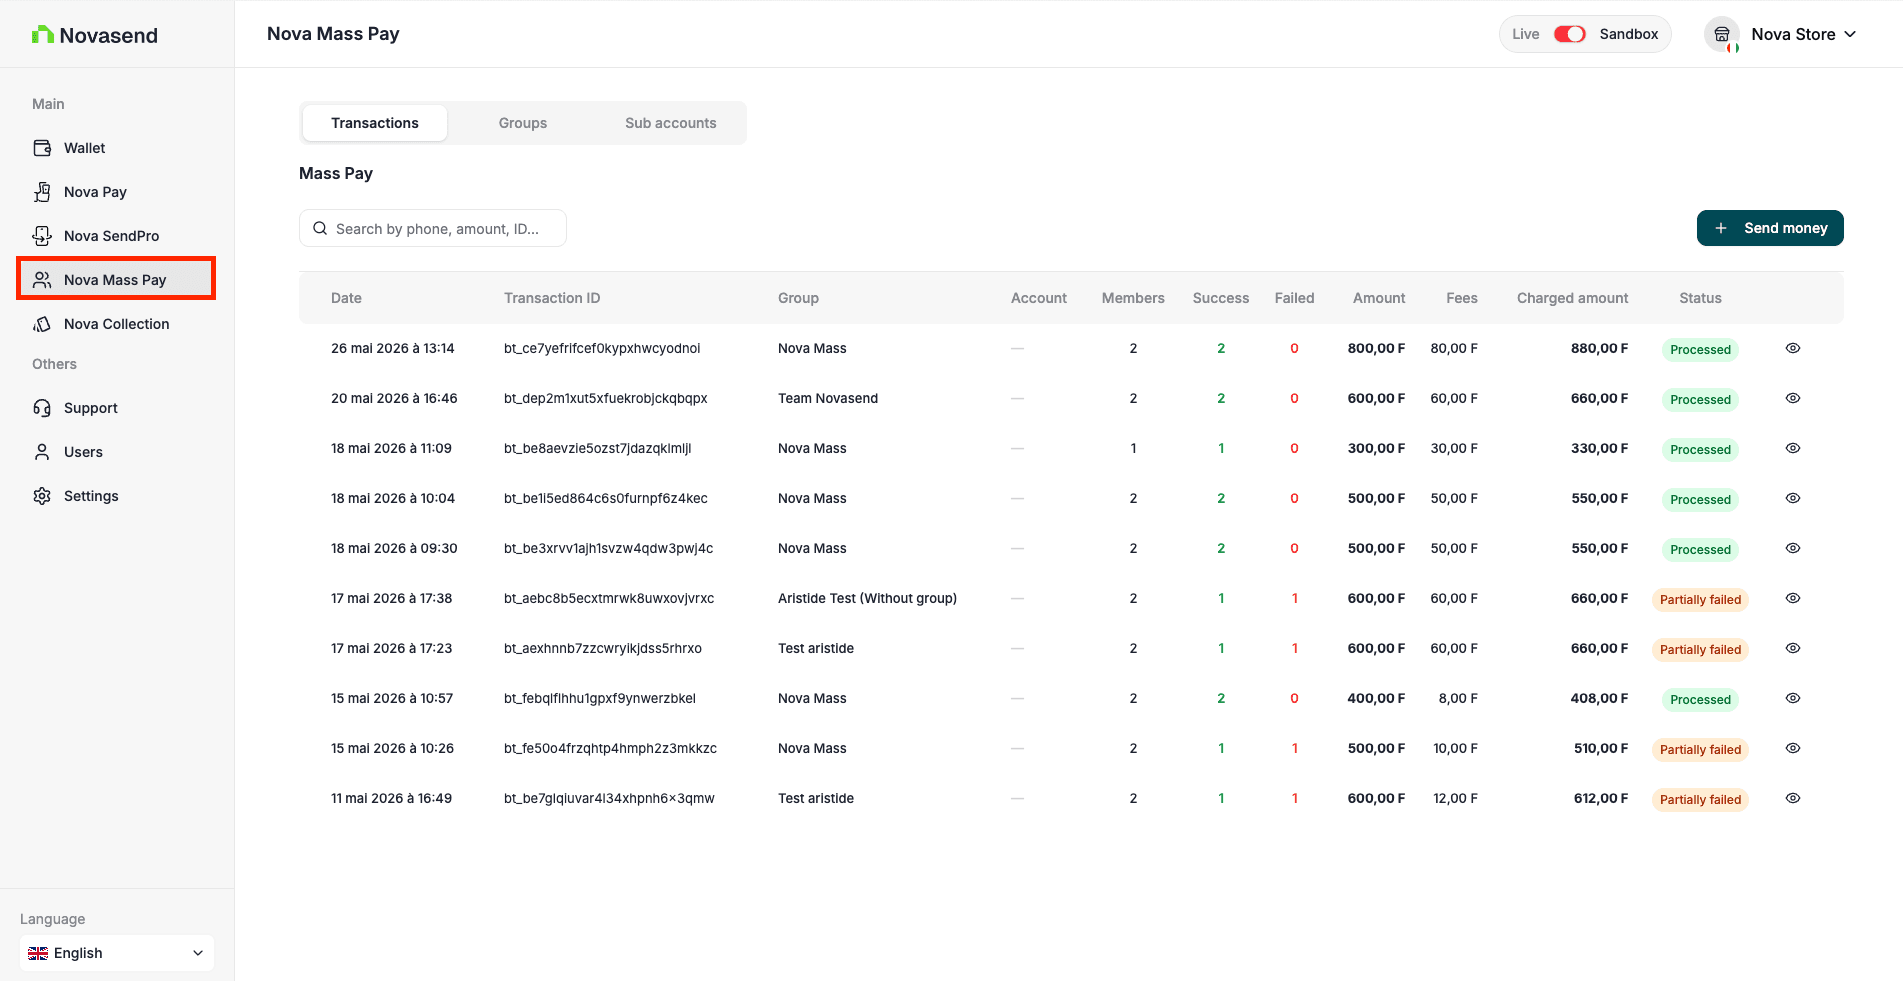
- Click on Nova Mass Pay in the sidebar.
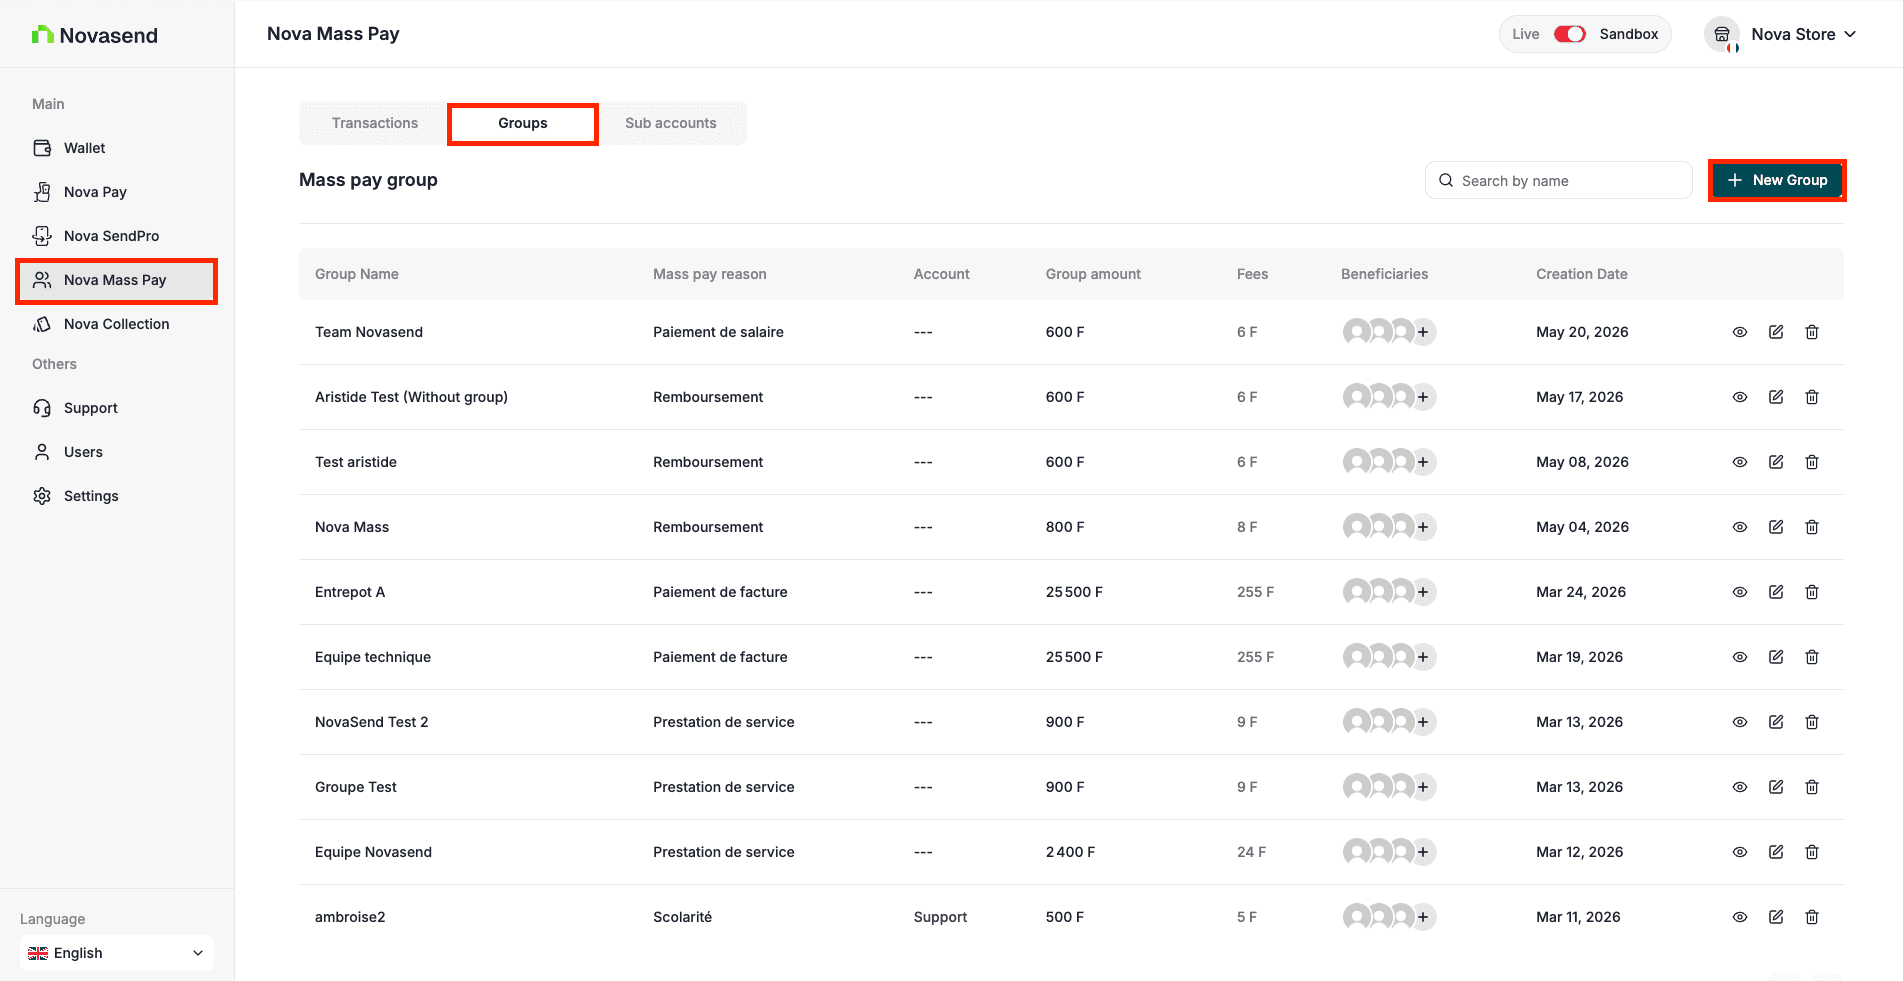
- To make a mass payment, create a group first. Click the Group tab, then the New group button.
Step 3: Group information
- Enter the group name.
- Choose the group creation reason from the dropdown list.
Step 4: Add beneficiaries
Now fill in the beneficiaries' information. You have two options:
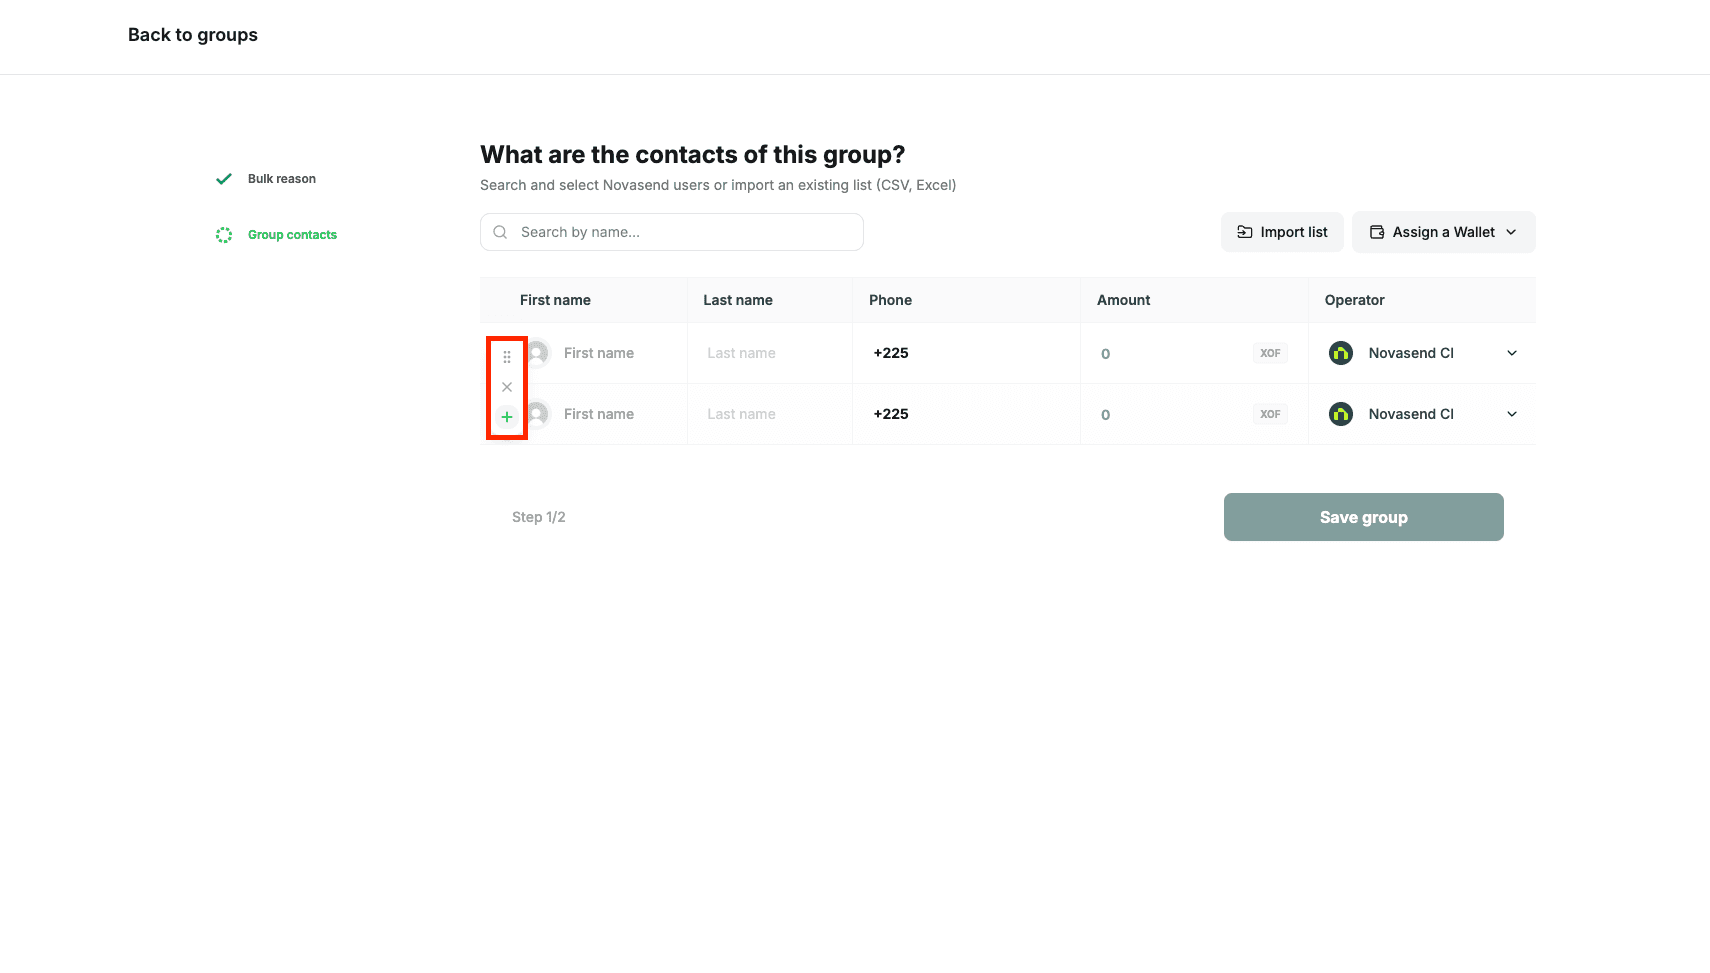
Option A: Manual entry
- Hover on the list to reveal the vertical button on the right to add, move, or remove a member from the group.
Option B: Import list
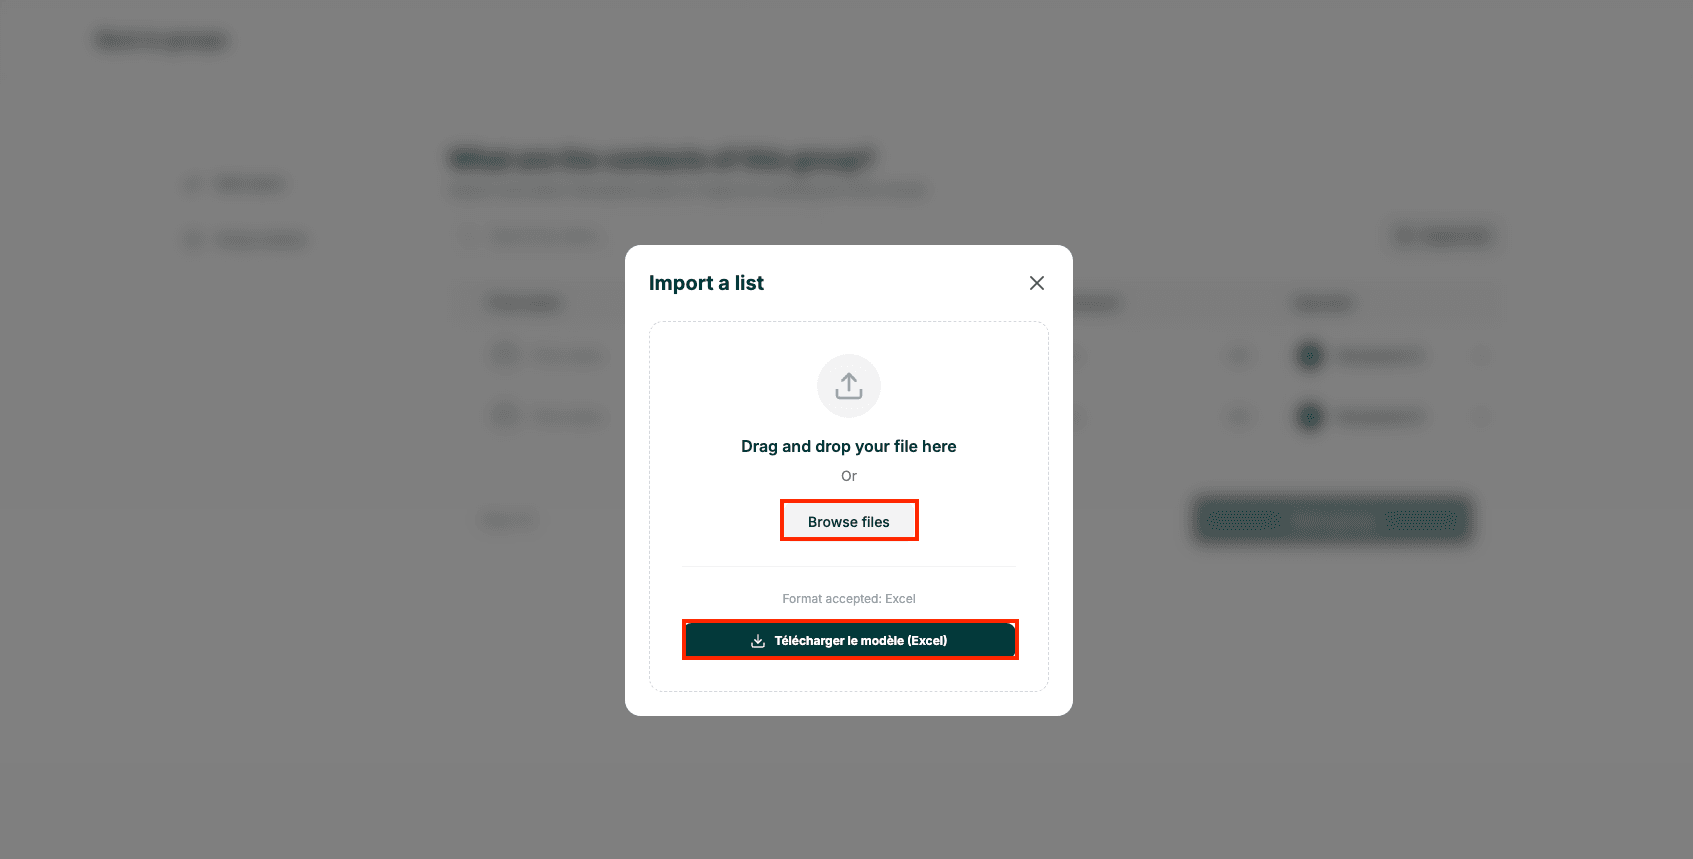
- Click the Import list button to import a pre-existing group in Excel, CSV, or XLSX format.
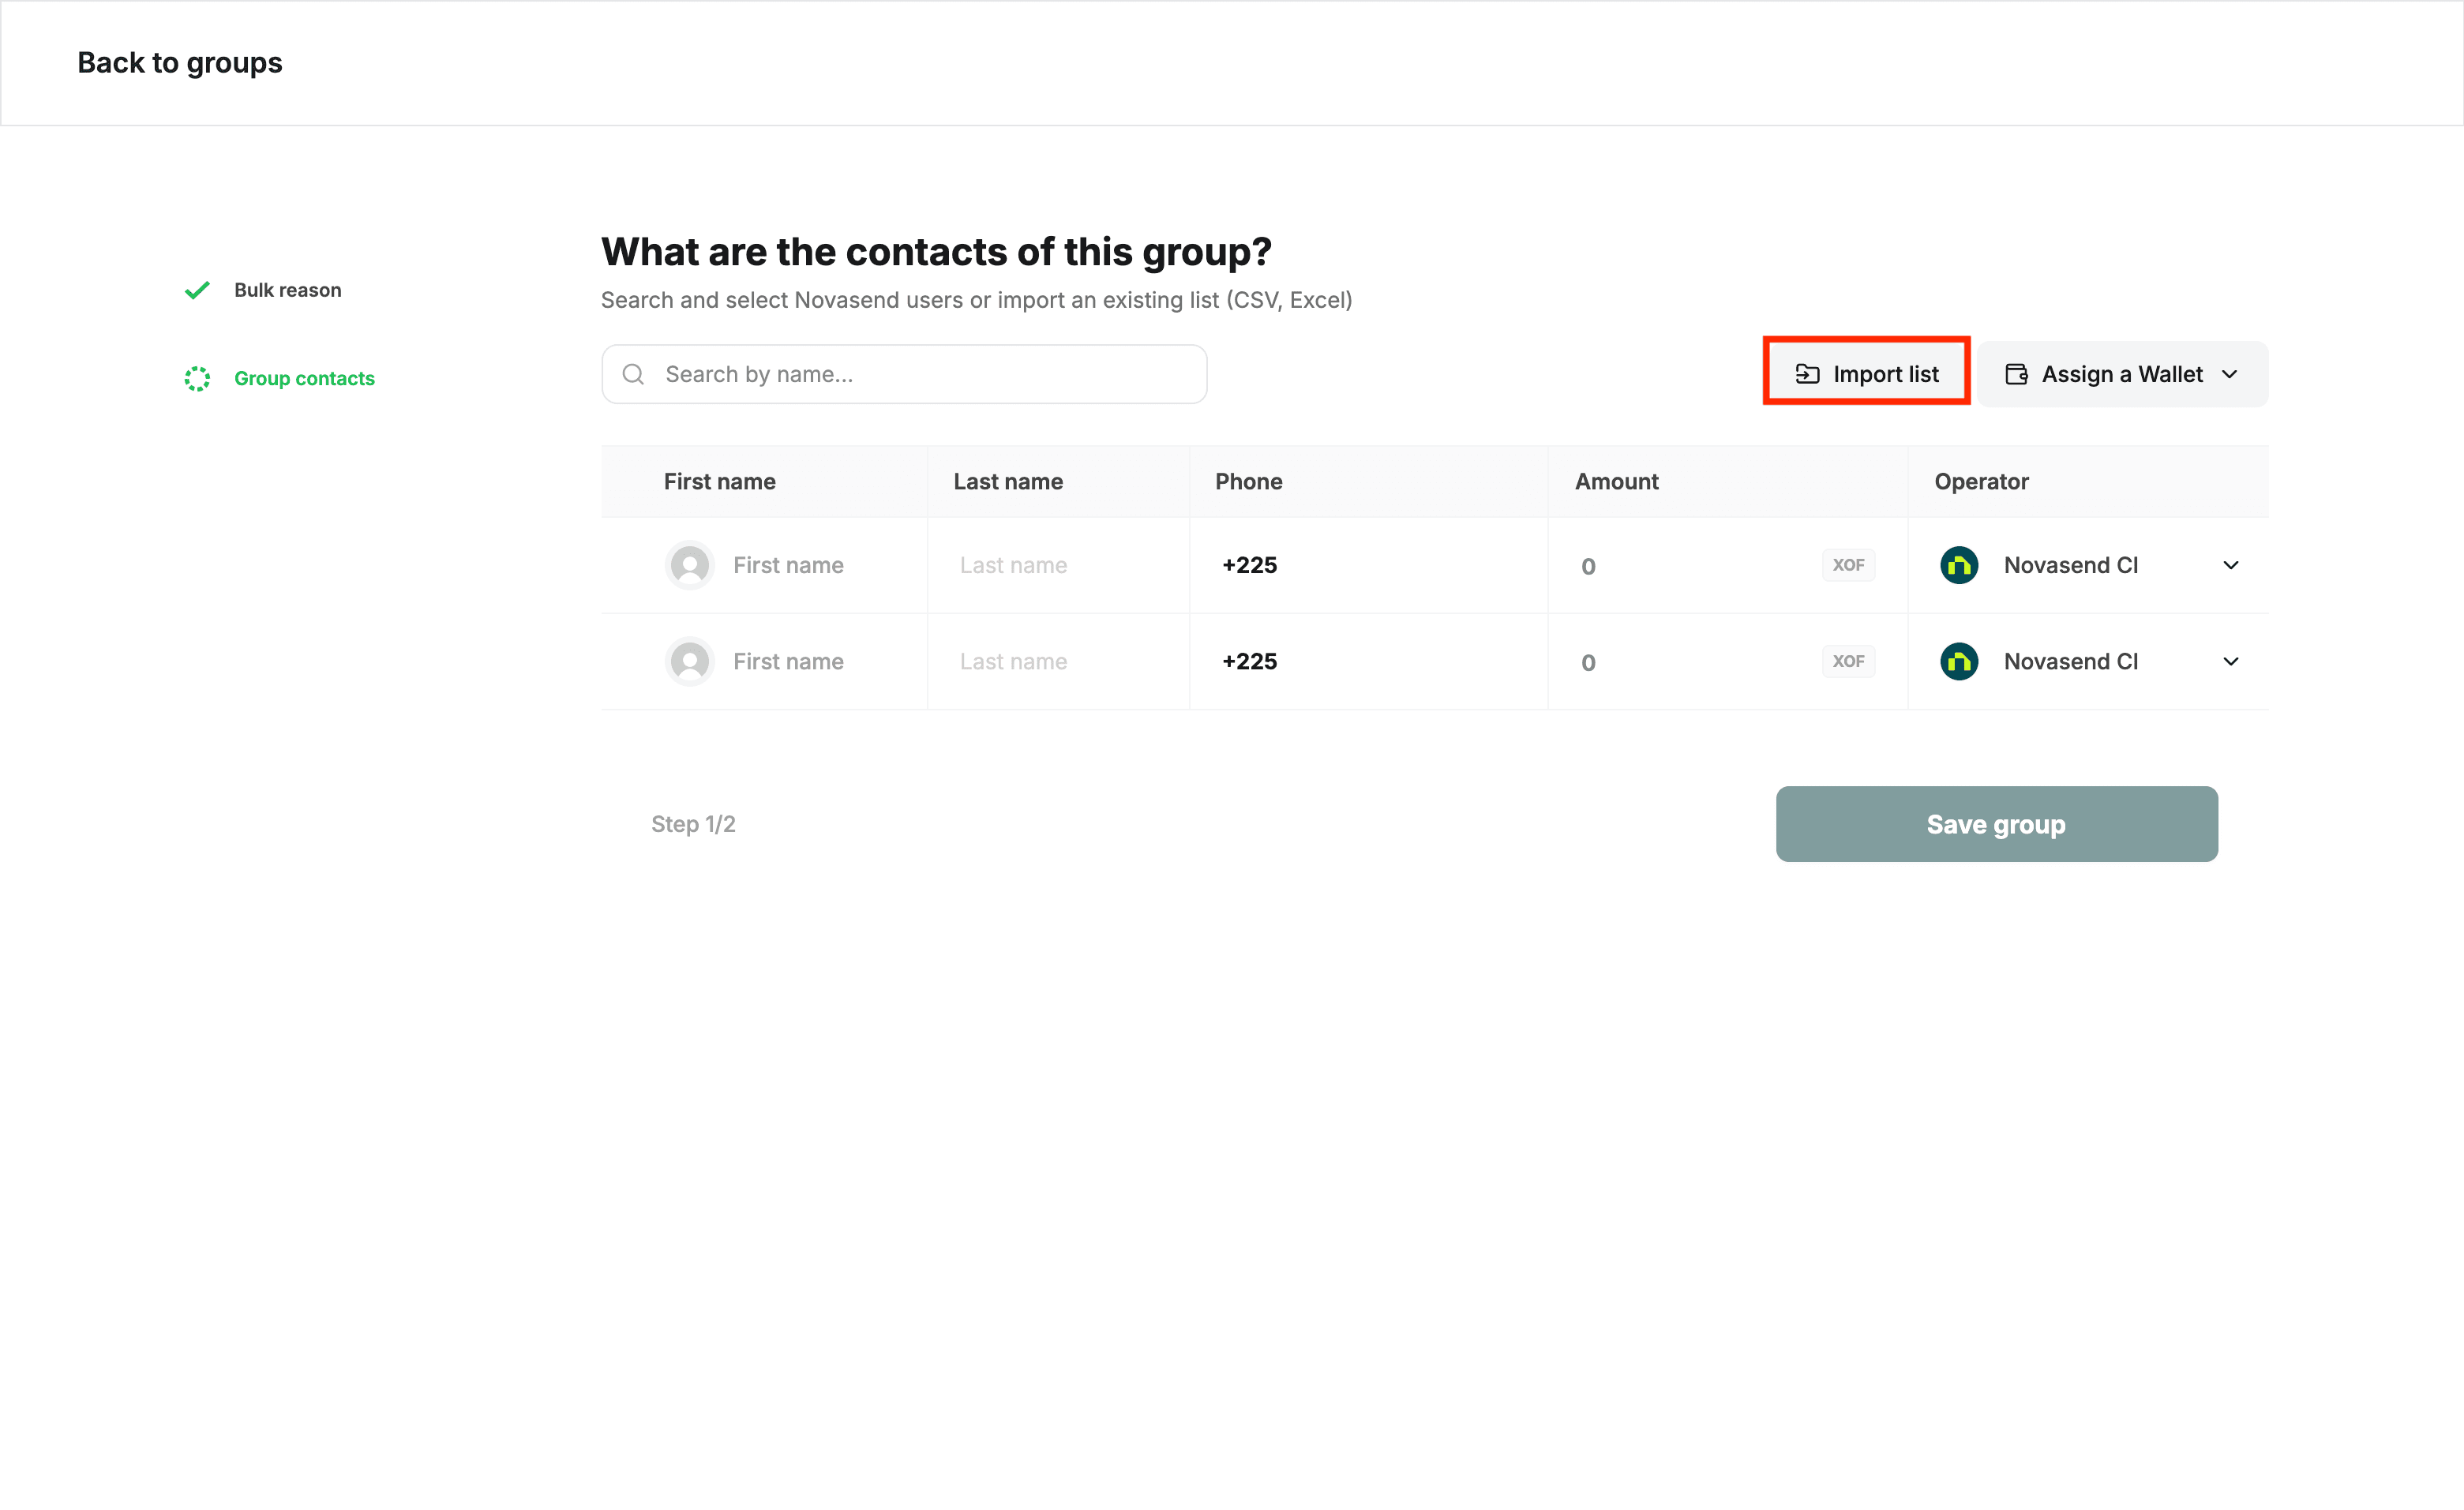
- In the import modal, download the sample file by clicking Download template (excel). Fill it out to make group creation easier.
How to fill out the Excel file:
First, open the downloaded file in Excel. Then:
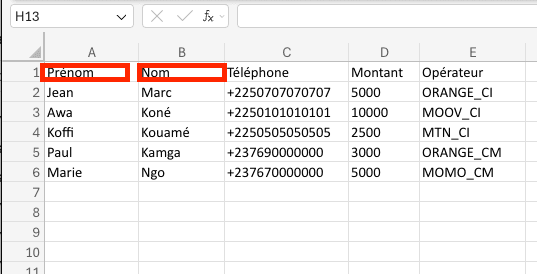
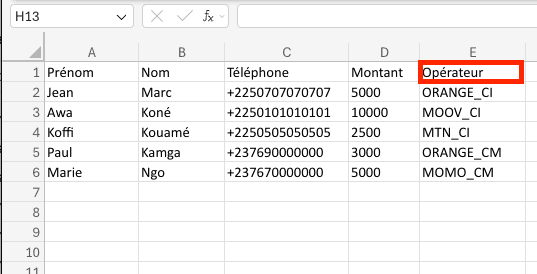
- First and last name: Add the first and last names of group members.
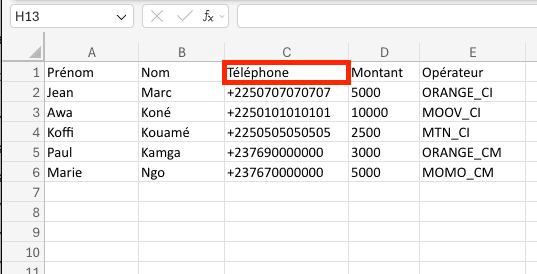
- Phone number: Add the phone number preceded by the country code +225 for Côte d'Ivoire and +237 for Cameroon.
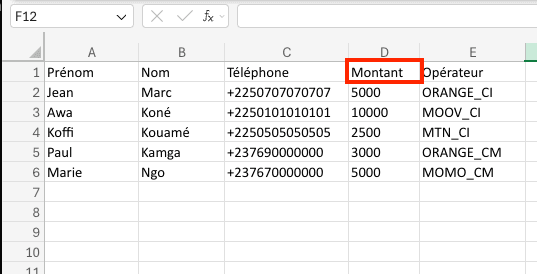
- Amount: Enter the amount you want to send to each member.
- Operator: Enter the operator name carefully. The format always ends with an underscore and country code: _CI for Côte d'Ivoire and _CM for Cameroon, preceded by the operator name.
Here are some examples:
Côte d'Ivoire - CI
| Provider | Code |
|---|---|
| Novasend | NOVASEND_CI |
| Orange | ORANGE_CI |
| MTN | MOMO_CI |
| Moov | MOOV_CI |
| WAVE | WAVE_CI |
Cameroon - CM
| Provider | Code |
|---|---|
| Novasend | NOVASEND_CM |
| Orange | ORANGE_CM |
| MTN | MOMO_CM |
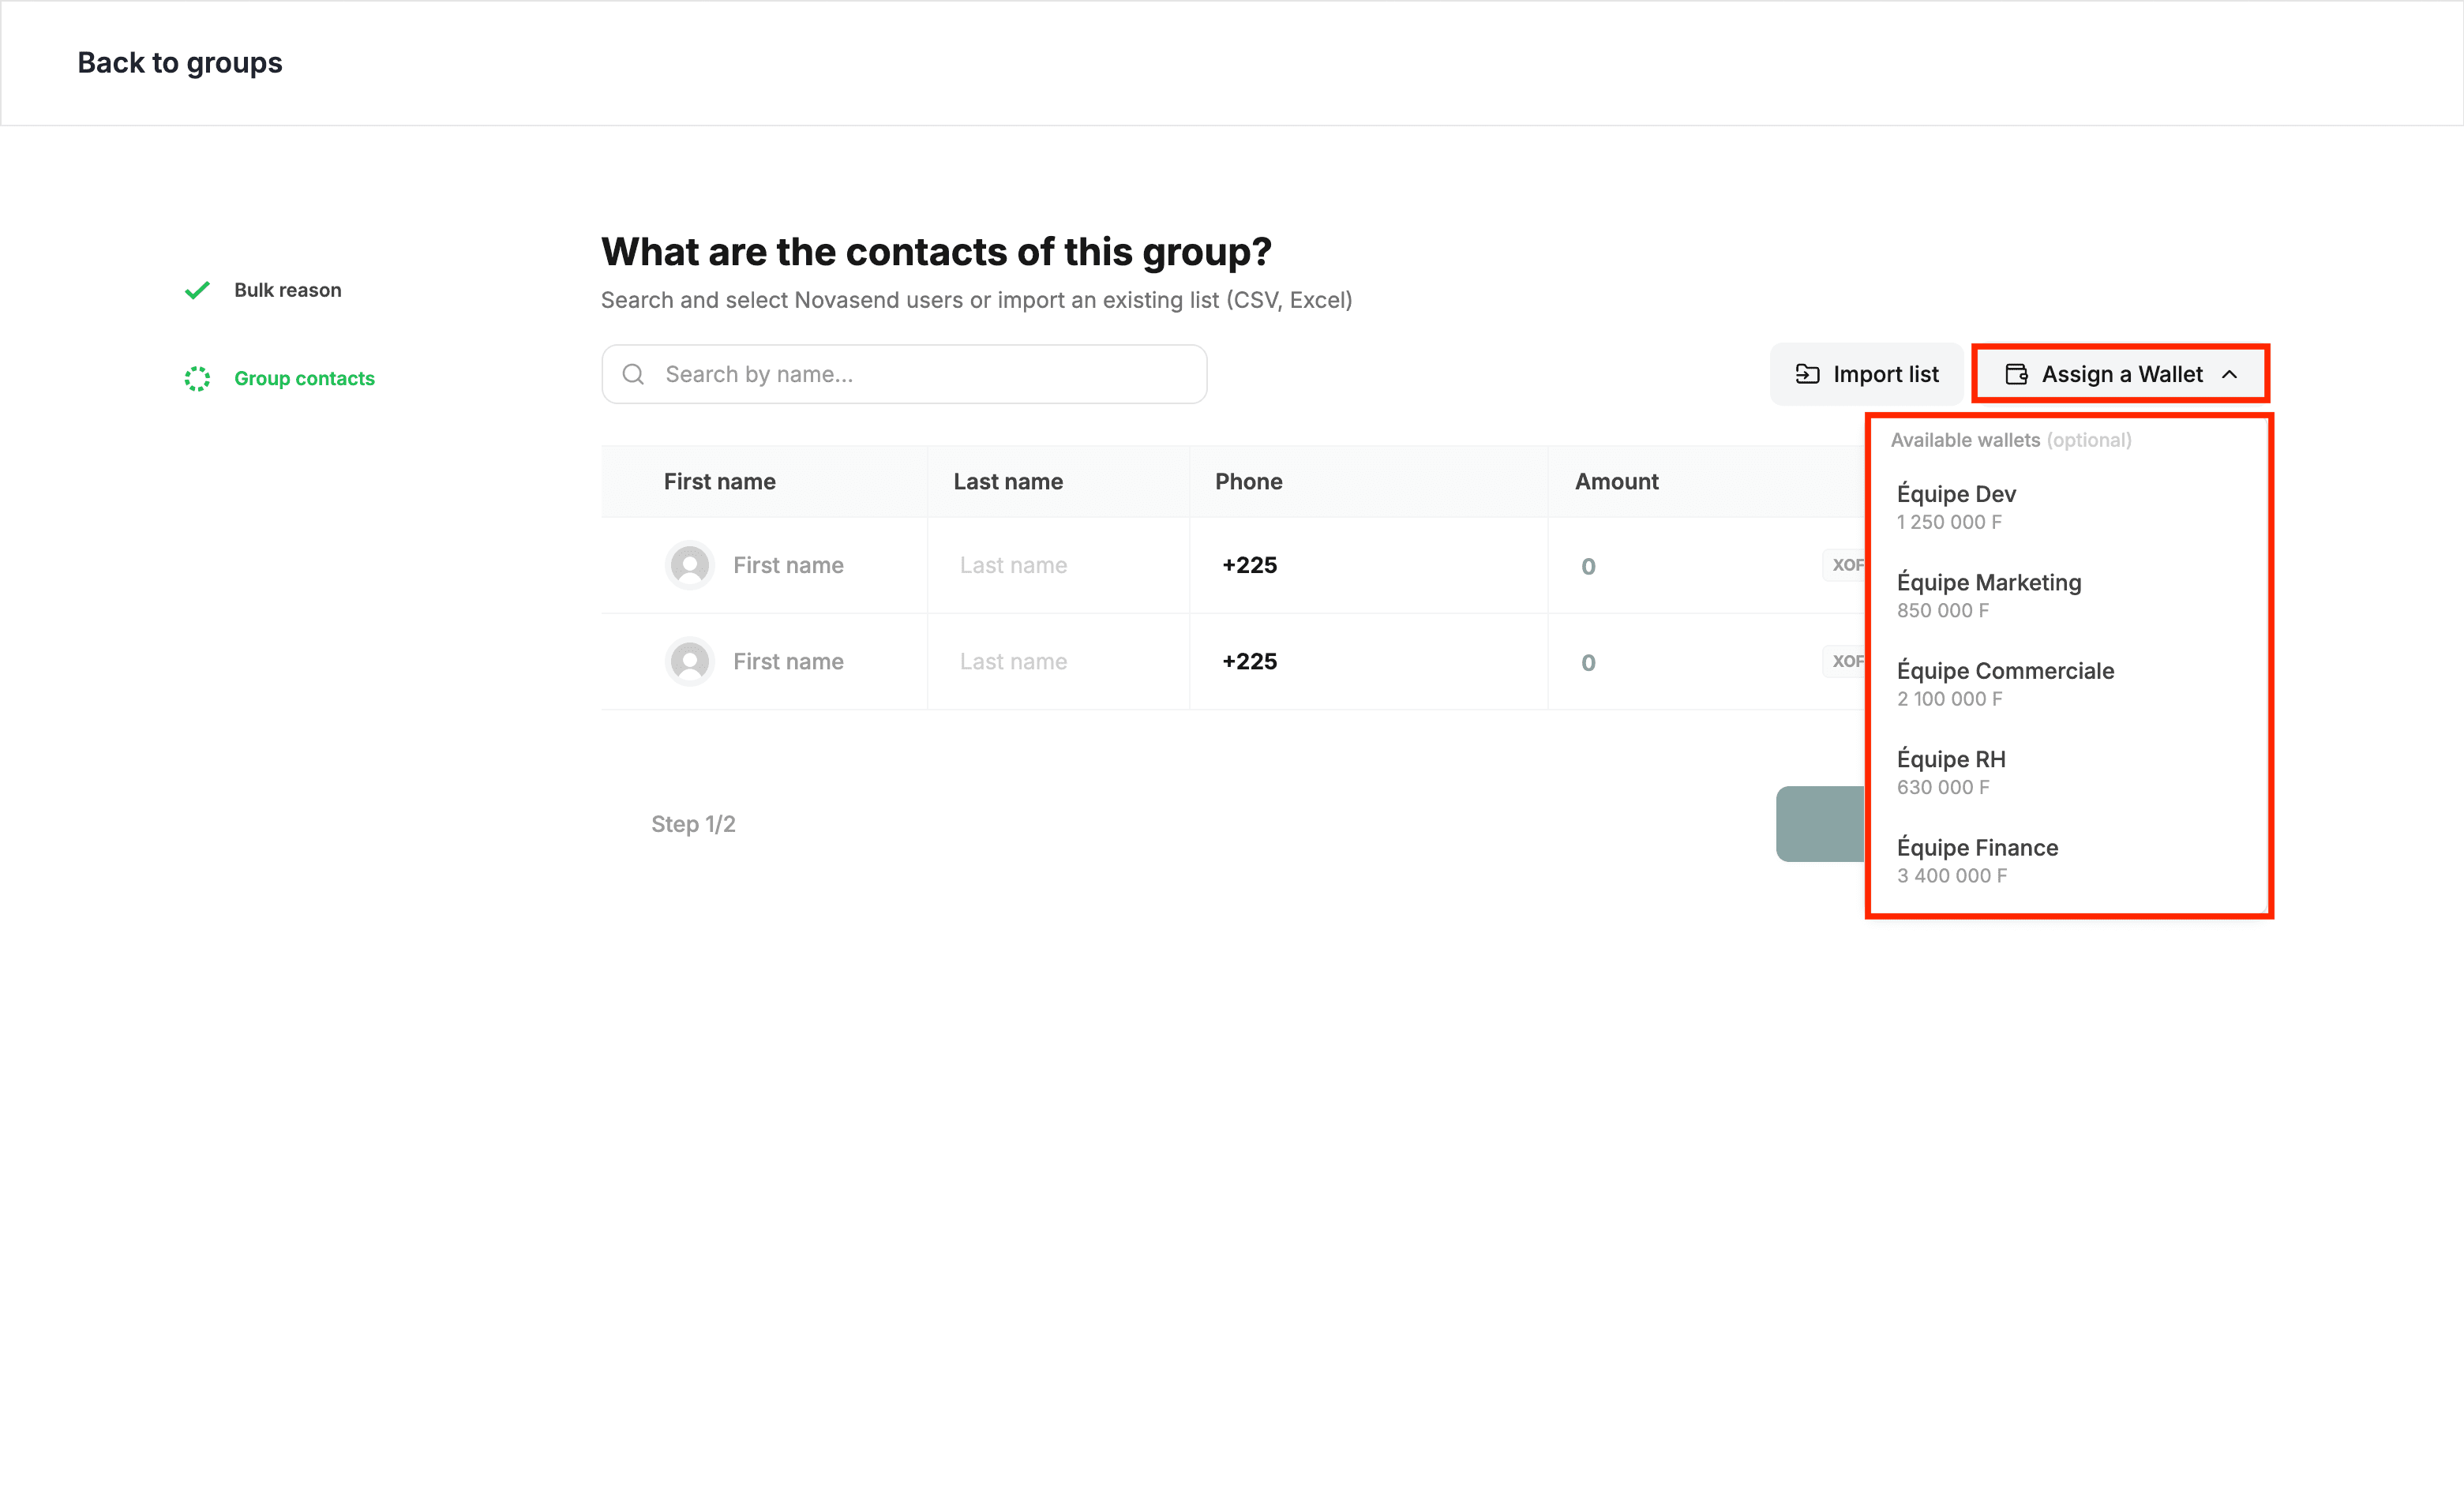
Sub-account
Select the sub-account to use from the corresponding dropdown in the section.
- Once beneficiaries are added or imported and the sub-account is linked if applicable, click Save group to finalize group creation.
Make sure to verify the amounts, phone numbers, and operators. You can still modify them later, either by editing the group directly or during the mass payment.
Step 5: Initiate mass payment
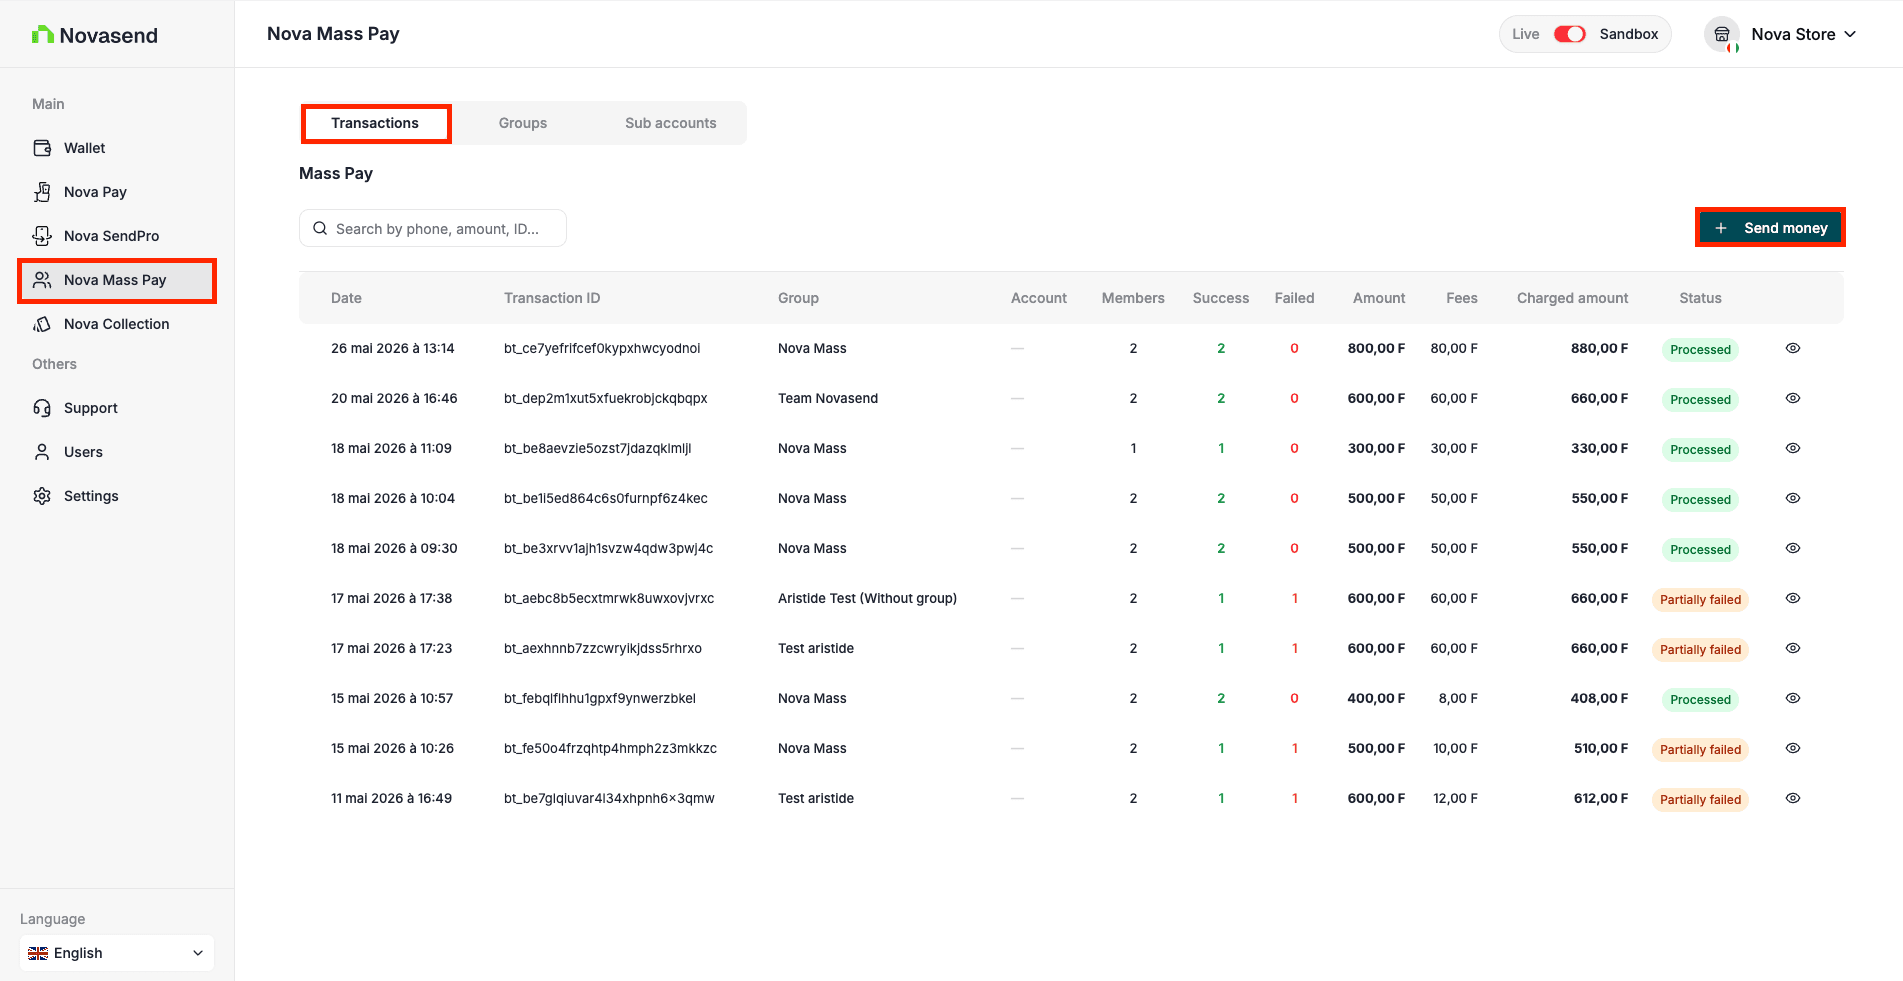
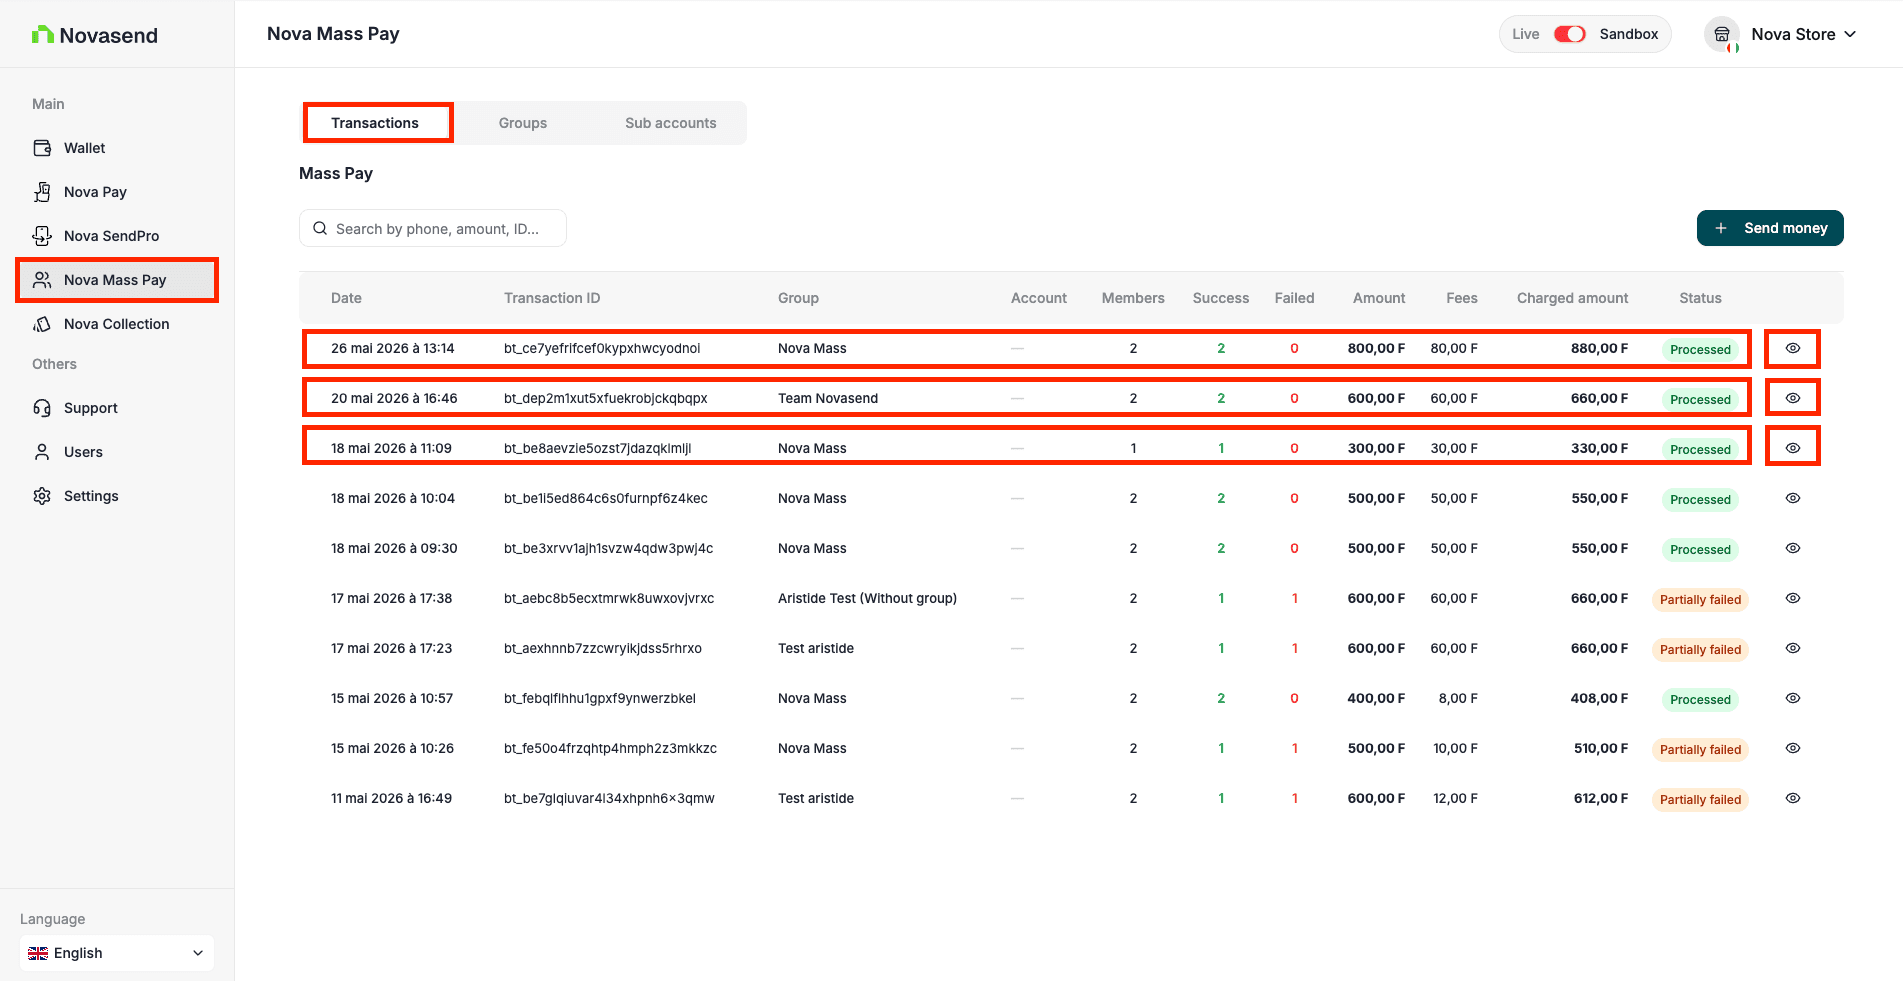
- Return to the main Nova Mass Pay page, click the Transactions tab, then Send money.
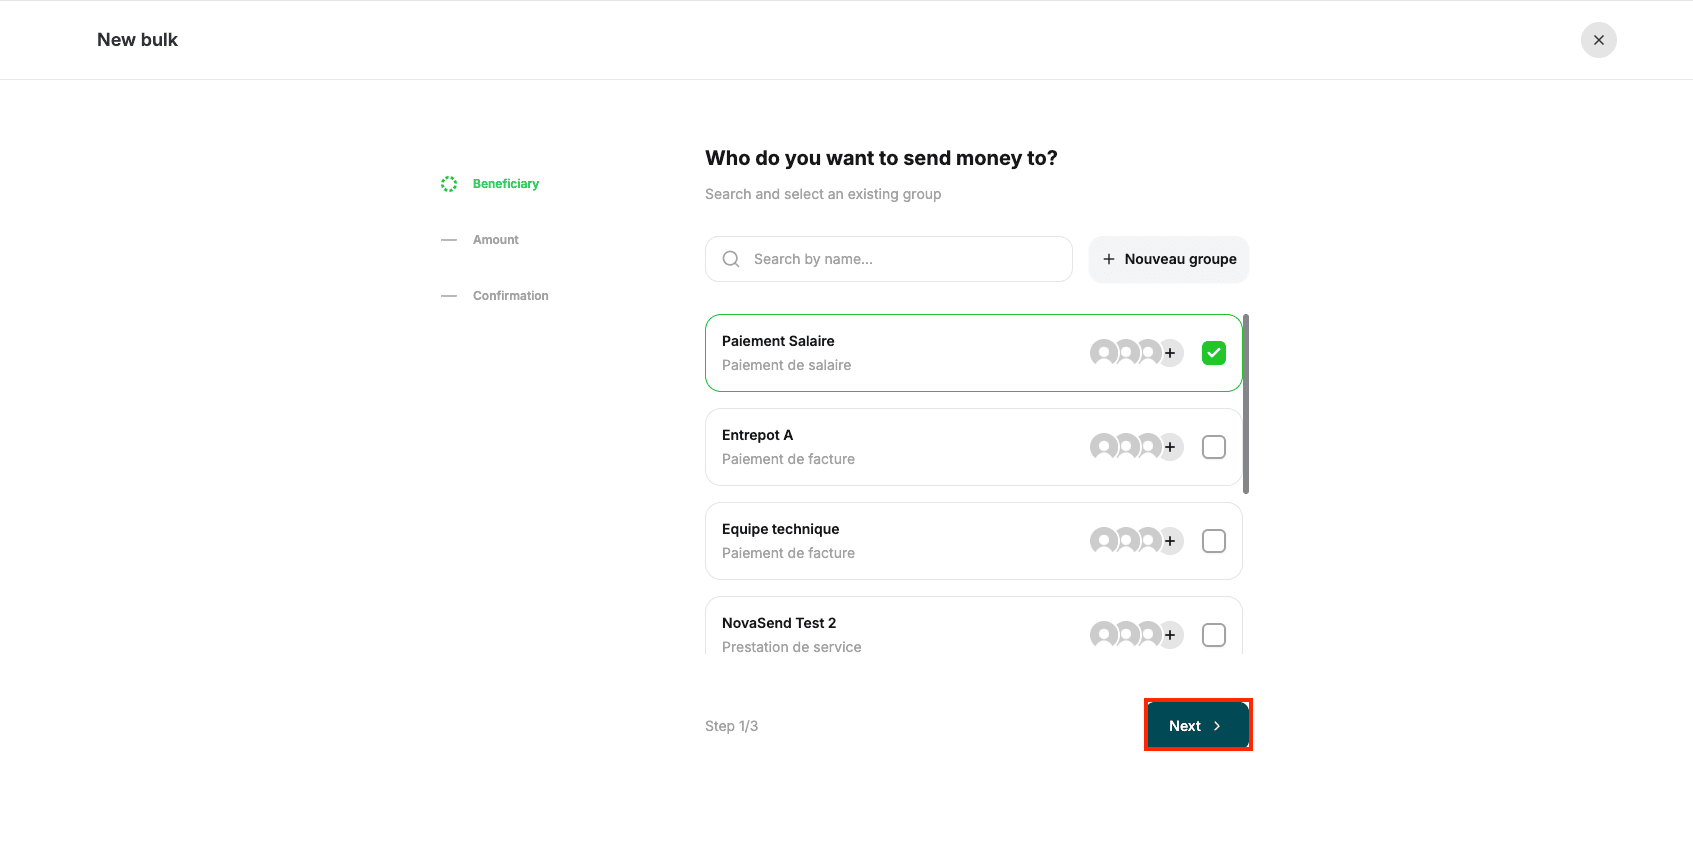
- Select the group you want to pay by checking it, then click Next.
-
You will see the list of members in the group. You can edit and adjust them before continuing. You can also uncheck members to exclude them from this specific mass payment.
-
Enter the required mass pay reason (this reason is different from the group reason; for example: salary payment). Then choose the sub-account to use for the payment. You can skip this choice; your main account will be used. Click Next.
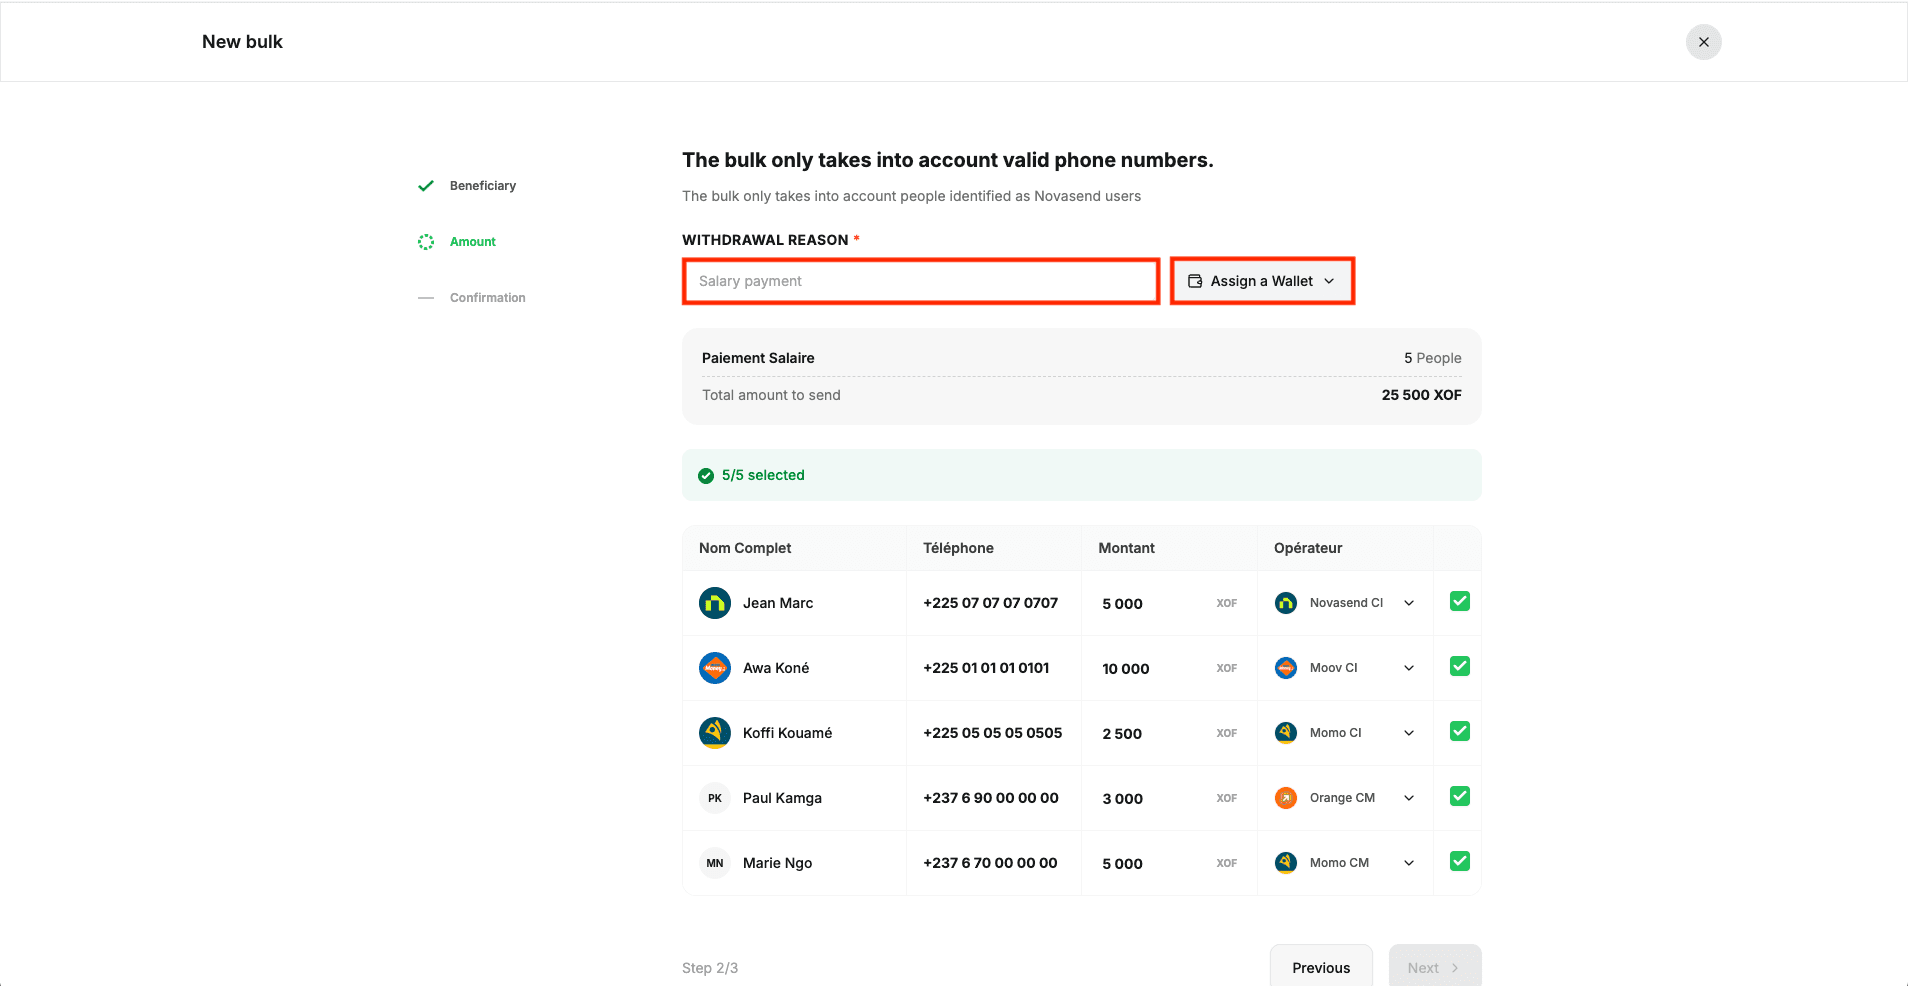
- You will reach the summary screen. Check all information one last time before confirming the transaction.
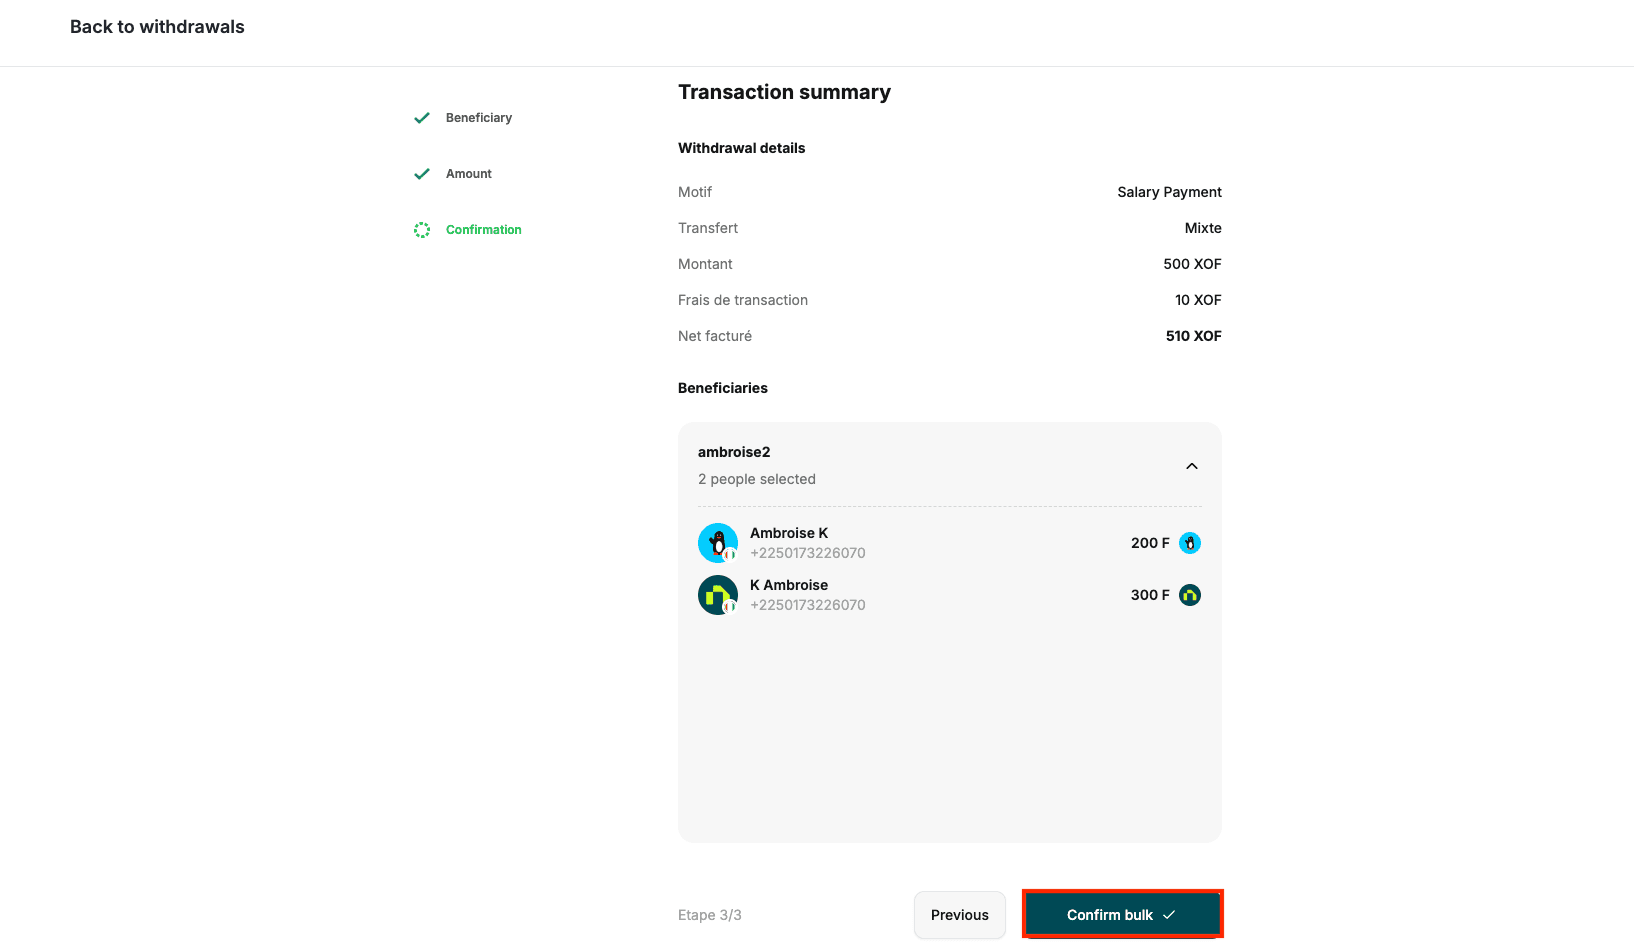
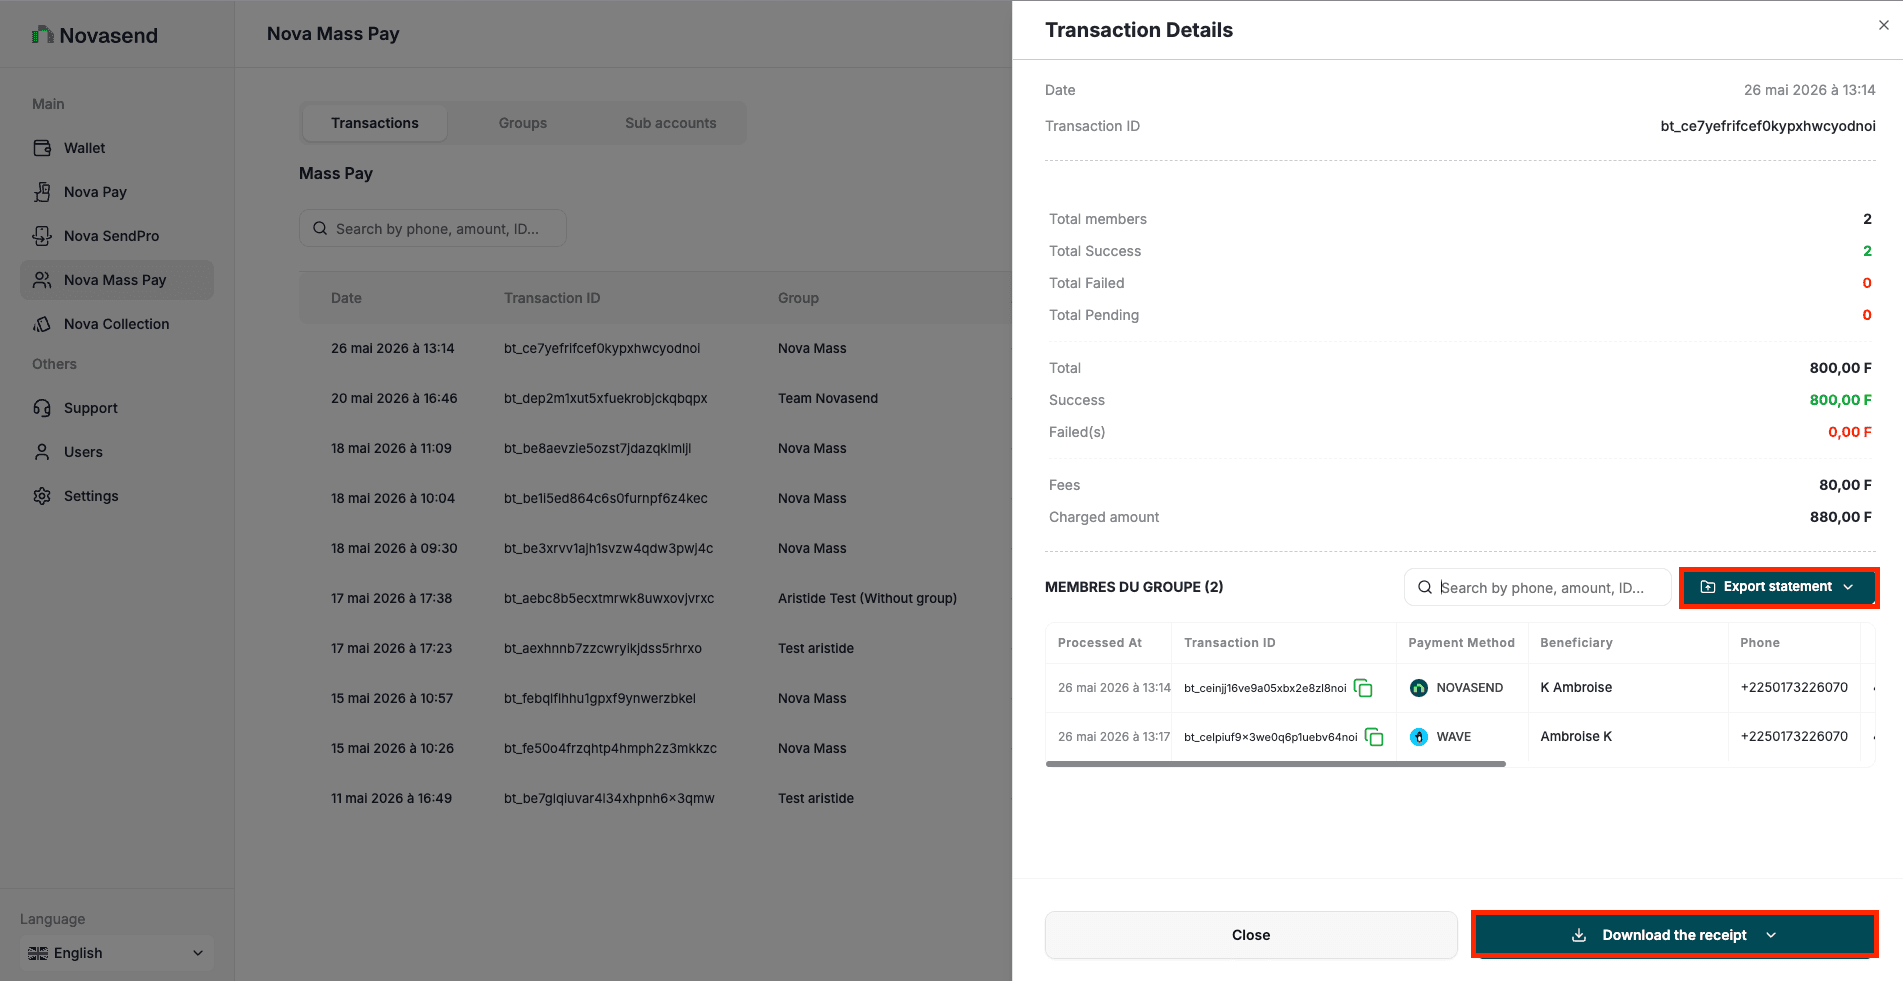
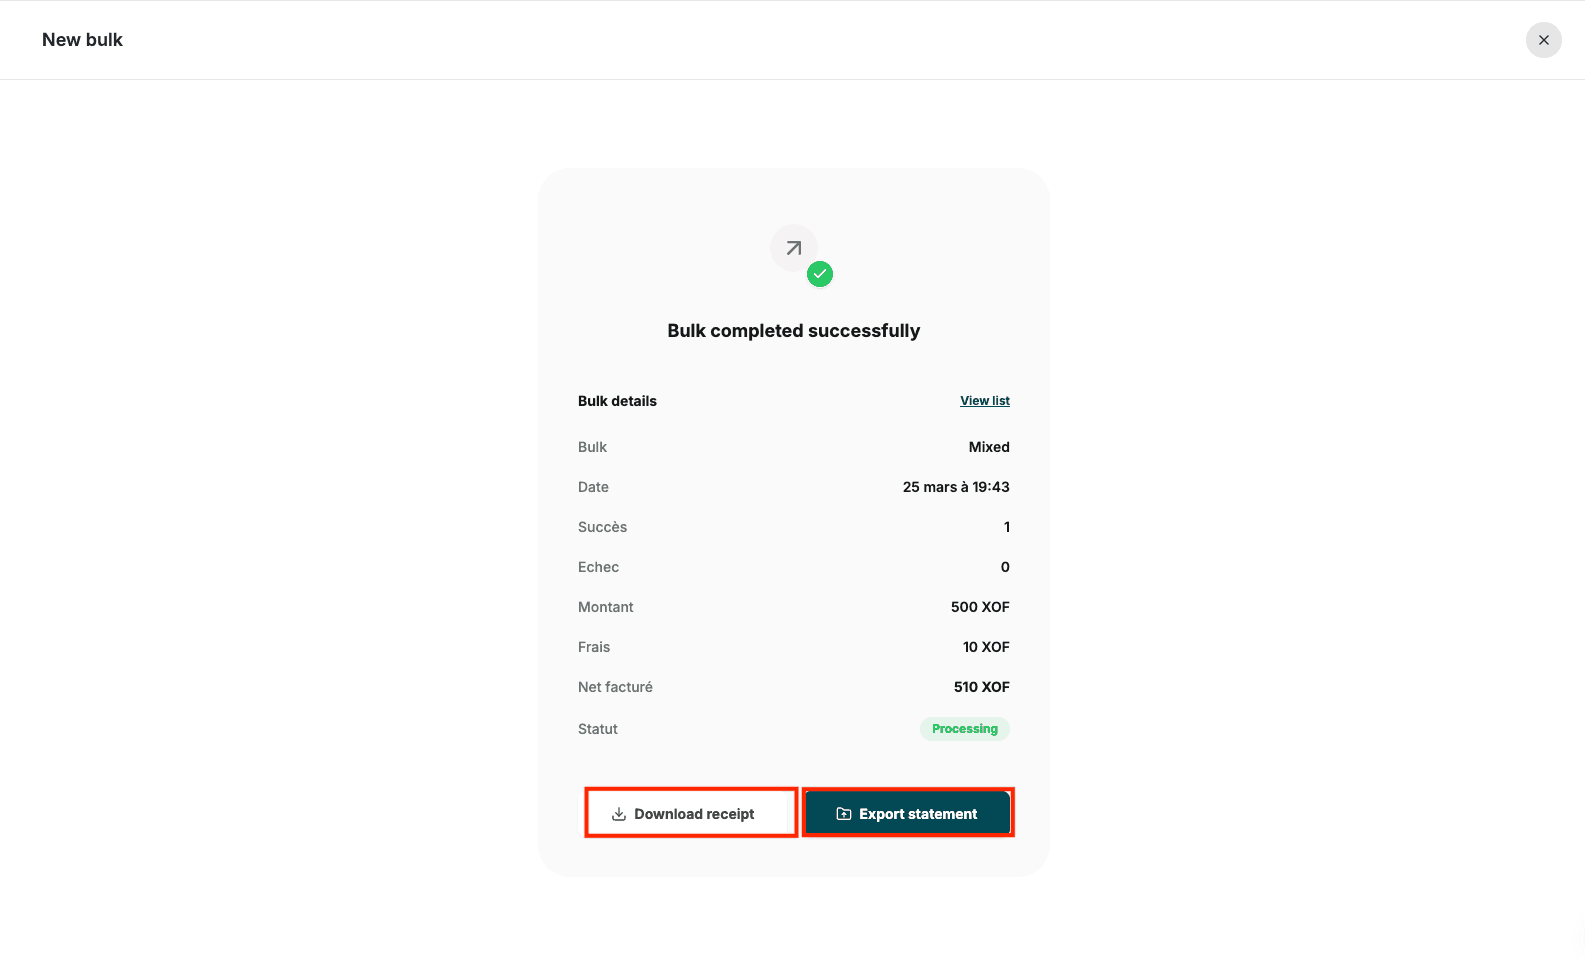
- Once the mass payment is sent, you will be redirected to the success screen. You can:
- Download receipt: for the overall mass payment transaction.
- Export statement: includes more details, including the full list of members.
- You can also download receipts and statements for mass payments from the Transaction tab in Nova Mass Pay.
-
Click on a mass payment in the list or on the eye icon to see transaction details.
-
Click Export statement to download the statement.
-
Click Download receipt to download the receipt.